Thank you to Daddy Bob for these instructions!
Preliminaries:
Before editing photos for use on a web site, it is recommended that you create a folder with sub-folders for the raw photos, and another folder with sub-folders for the finished photos. The photos from the camera go into the raw folder where they remain in their original form. All edited photos are saved to the finished photos folder. This assures that the original photos will always be available should there be a mistake made while editing or additional editing be desired at a later date.
These two folders should not be kept in the same folder as the local copy of the website, unless they are marked to prevent them from being uploaded when the site is updated. For use in these instructions, these two folders will be named “Raw Photos” and “Finished Photos”
The finished photo file names should be in all lower case letters containing no capitals or spaces. If a space is deemed to be absolutely necessary use the underline “_” character in lieu of the space. The size of all uploaded photos should be less than 50 KB each. Before using your photos in creating a web page or uploading, check to be sure that all photos meet these requirements.
Part II: Using IrfanView
When the Irfanview program opens a blank screen is displayed with the menu at the top.
Click on File then Open. In the “Look In” space at the top, locate the Raw Photos folder and the sub folder in it where you have saved the photos from the camera. Select the photo you want to prepare for use on the website.
Cropping:
Probably, the first thing you need to do is crop the photo. Cropping should always be done before resizing. To do this, position the cursor at the top left corner of what you want to be the finished photo. Hold down the left mouse button, and draw a box around the part of the photo you want to keep. The perimeter of the crop box can be changed by clicking on the edge and dragging it to the location you want.
Click Edit/Crop selection OR press the CTRL+Y key combination to crop it. If this is not what you wanted, click Edit/Undo to return to the full size and start the cropping process again..
Resizing
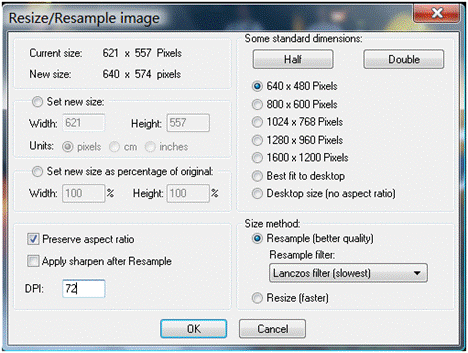
The next action will normally be to resize the photo. Click Image then Resize/Resample or press CTRL+R.
Set the DPI at the bottom left to 72.
Select the size of the photo desired.
For most Real Estate sites, 640 pixels wide is preferred.
For shopping carts, 500 is preferred.
Other sizes may be required for other websites.
Click the circle in front of “Set new size” and set the width to 640, 500, or whatever other size is desired.
Allow the height to automatically go to whatever it needs to preserve the aspect ratio.
Click OK.
Be sure the checkbox in front of “preserve aspect ratio” has been checked.
Saving the Modified Photo
Click File, then “Save as” or press the “S” key.
In the “Save In” space at the top, locate and select the Finished Photos folder then the sub-folder you created earlier in it.
In the “File Name” space at the bottom, enter the name you want to give to the saved photo file.
Remember the naming requirements of using all lower case letters, with no capital letters or spaces.
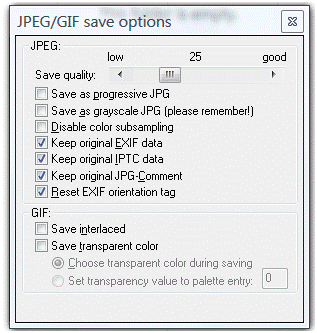
To the right you will see the Save options dialog. It may be displayed partially off screen. Place the cursor in the top section of this dialog, hold down the mouse button and drag it into full view near the center of the screen.
Set the “Save quality” slider at the top to about 25.
This should force the saved photo to be smaller than the 50 KB desired.
All other settings can be left at the default shown when the dialog opened. Once this setting has been made, it will be remembered until it is manually changed making it unnecessary to reset on any future save.
Batch Resizing and Renaming:
With the program open, click File and select “Batch Conversion/Rename” or just press the “B” key. This dialog opens:
In the “Look in” space, locate the folder that contains the photos you want to resize and/or rename. Click on the photo file name, and it will be copied to the “Input files” box at the bottom right. There are buttons that you can click to perform a variety of selection choices like Add, Add all, Remove, Remove all, Sort, Move up or down, etc.
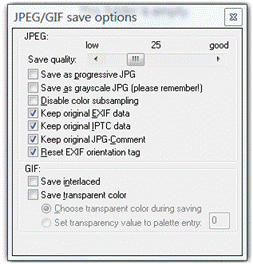
On the top left, you select “Batch conversion”, (resize), “Batch rename”, or both. Select the Output format type, then uncheck the “Use advanced options” unless there is something there that you want to use. To the right of the Output format space is an Options button that opens this dialog.
The only setting here that is relevant is the Save quality slider which should be set to about 25.
On the middle left there is a space for “Name pattern”. Click the Option button to the right and this opens:
Here you enter the common name that you want all the photos to start with, followed by the pound sign “#” for each digit you want in the name. i.e.: If the name you want is test, and the number of photos is 20, then you would enter test## to get 20 photos with the names test01 through test20. Other settings are possible also.
The next space down is labeled, “Output directory for result files:”. Here you enter or browse for the folder where the modified photos are to be saved.
Click the Start Batch button, and the photos will be renamed and/or resized and saved to the designated folder.


